Difference between revisions of "CI"
| Line 27: | Line 27: | ||
| − | Here will be asked to enter the password located in the C:\Program Files (x86)\Jenkins\secrets\initialAdminPassword(this is an example) | + | Here will be asked to enter the password located in the C:\Program Files (x86)\Jenkins\secrets\initialAdminPassword (this is an example). |
Once finded the password, copy and paste it under Administrator password. Then press continue. After this press install suggested plugins. | Once finded the password, copy and paste it under Administrator password. Then press continue. After this press install suggested plugins. | ||
| Line 95: | Line 95: | ||
How to install SonarQube LTS (5.6.6) and SonarQube Scanner (3.0.3.778)? | How to install SonarQube LTS (5.6.6) and SonarQube Scanner (3.0.3.778)? | ||
| − | SonarQube can be downloaded [https://www.sonarqube.org/downloads/| here] | + | SonarQube can be downloaded [https://www.sonarqube.org/downloads/| here]. |
| − | SonarQube Scanner can be downloaded from the [https://docs.sonarqube.org/display/SCAN/Analyzing+with+SonarQube+Scanner| following link] | + | SonarQube Scanner can be downloaded from the [https://docs.sonarqube.org/display/SCAN/Analyzing+with+SonarQube+Scanner| following link]. |
By clicking on Windows 64 bit as shown on the picture below, the download wil start. | By clicking on Windows 64 bit as shown on the picture below, the download wil start. | ||
| Line 117: | Line 117: | ||
| − | This can be checked by the following link: [http://localhost:9000/| SonarQube] | + | This can be checked by the following link: [http://localhost:9000/| SonarQube]. |
On the picture below, on the left side of the screen it shows that the SonarQube server is successfully started. | On the picture below, on the left side of the screen it shows that the SonarQube server is successfully started. | ||
| Line 128: | Line 128: | ||
[[File:sonar_web_port.jpg|400px]] | [[File:sonar_web_port.jpg|400px]] | ||
| + | |||
| + | |||
| + | For SonarQube Scanner: | ||
| + | |||
| + | The following link can be used to install SonarQube Scanner: [https://docs.sonarqube.org/display/SCAN/Analyzing+with+SonarQube+Scanner| SonarQube Scanner]. | ||
| + | |||
| + | These settings must be filled in Jenkins (IN DE BUILD EN CONFIGURE) | ||
| + | |||
| + | After Apache Ant, SonarQube and SonarQube Scanner are installed, the next step is to further configure Jenkins. | ||
| + | |||
| + | Now ANT, JDK and Sonarqube need to be installed in Jenkins. In order to do this: | ||
| + | |||
| + | First the button Manage Jenkins in the Jenkins homepage must be pressed, then Global Tool Configuration must be clicked. Once the button Global Tool Configuration was clicked it will appear a menu that will look like the picture below. | ||
| + | |||
| + | |||
| + | [[File:Globaltoolconfigjenkins.png|400px]] | ||
| + | |||
| + | |||
| + | The button JDK installations needs to be clicked. Then there will appear a menu that will look like the picture below. | ||
| + | |||
| Line 135: | Line 155: | ||
openmbd.com/wiki/CI/Jenkins | openmbd.com/wiki/CI/Jenkins | ||
| + | |||
openmbd.com/wiki/CI/SonarQube | openmbd.com/wiki/CI/SonarQube | ||
Revision as of 11:40, 30 October 2017
Info about our CI and Test Automation server to be posted here.
All subpages need to be subpages of www.openmbd.com/wiki/CI (e.g. www.openmbd.com/wiki/CI/Jenkins or www.openmbd.com/wiki/CI/SonarQube, etc.)
How to set-up Jenkins to build and test HANtune?
In order to install Jenkins, first the executable will need to be downloaded from the site of Jenkins
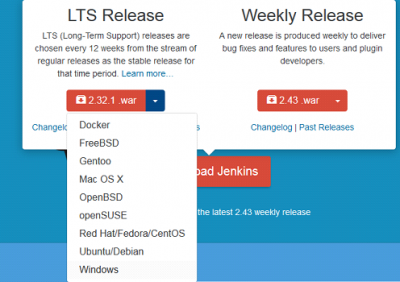
Press the download button. A pop-up menu will appear. From the menu select LTS Release (2.73.1) and click on the arrow, select Windows.
Then unzip the file that where downloaded and then click the executable.
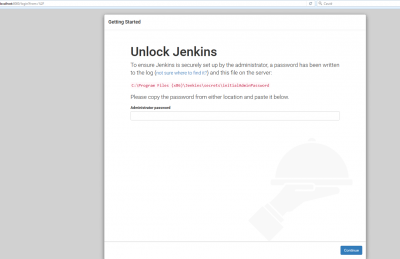
The installation process is going to start. Then follow the installation wizard. Choose the path where you want to install Jenkins. After the installation is over, open the webbrowser and type localhost:8080. It will direct to page as shown on the picture below.
Here will be asked to enter the password located in the C:\Program Files (x86)\Jenkins\secrets\initialAdminPassword (this is an example).
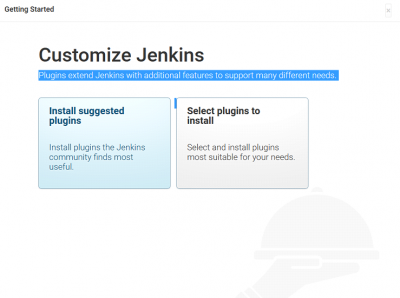
Once finded the password, copy and paste it under Administrator password. Then press continue. After this press install suggested plugins.
After the suggested plugins are installed a window will appear where the username, the password, full name, and email address must be set. After all this information was filled in click Save and finish. In the next window that will appear press Start using Jenkins.
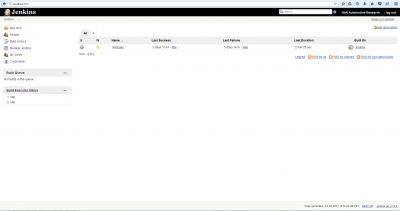
After this the Jenkins Dashboard will appear and will be similar with the picture below.
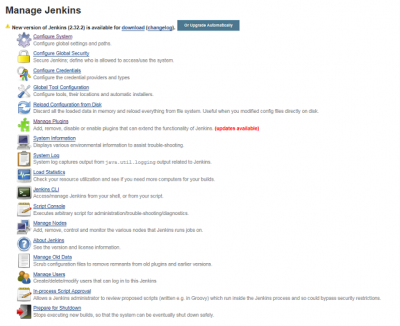
After this, Manage Jenkins needs to be clicked. A menu will show up and is going to look like the picture below.
From the list the button Manage Plugins needs to be selected. The following plugins will need to be installed:
- Locale Plugin;
- Multijob Plugin;
- Shared Workspace;
- TestComplete support plug-in;
- SonarQube Scanner support for Jenkins.
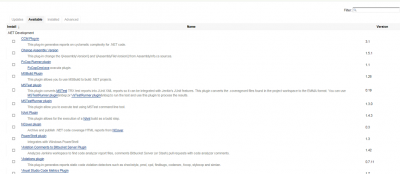
In order to install the plugins from the menu (see picture below) the button Available needs to be selected.
After Available was selected, in the search box it needs to be typed the name of the plugin that it is desired by the user to be install. In this case for example the MultijobPlugin. After the name of the plugin is typed the menu will look like the picture below.
The box needs to be clicked and then ‘Install without restart’ needs to be pressed.
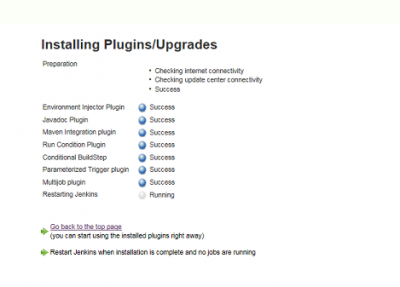
Then there will appear another menu for example like the picture below.
The option restart “Jenkins when…” will need to be selected. Then the same procedure will need to be repeated for all the plugins listed in the list above. In case it doesn’t restart automatically a refresh of the page is necessary.
After the plugins are installed the following programs will need to be installed on the PC:
- Apache Ant 1.9.7
- TestExecute 12
- SonarQube 5.6.6
- SonarQube Scanner 3.0.3.778
How to install Apache Ant 1.9.7?
In order to install Apache-ant-1.9.7 the program needs to be downloaded from the following site.
On the page, click on the External Mirror (source) and the download will start.
The following link will explain how Apache Ant can be installed.
How to install SonarQube LTS (5.6.6) and SonarQube Scanner (3.0.3.778)?
SonarQube can be downloaded here.
SonarQube Scanner can be downloaded from the following link.
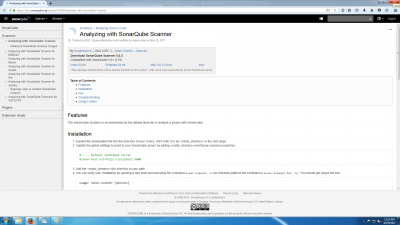
By clicking on Windows 64 bit as shown on the picture below, the download wil start.
The following steps must be followed to install SonarQube and SonarQube Scanner:
For SonarQube:
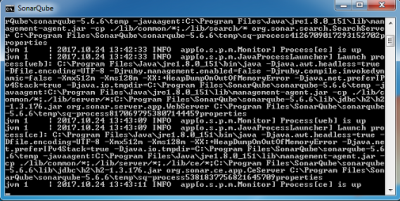
In Command Prompt go to the map where SonarQube is installed and start the service, for example:
C:\Program Files\SonarQube\sonarqube-5.6.6\bin\windows-x86-64>StartSonar.bat
If the service is up, SonarQube is installed properly.
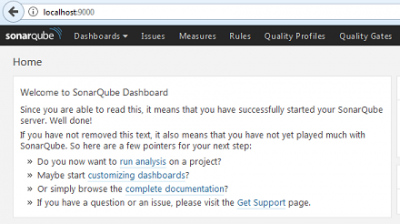
This can be checked by the following link: SonarQube.
On the picture below, on the left side of the screen it shows that the SonarQube server is successfully started.
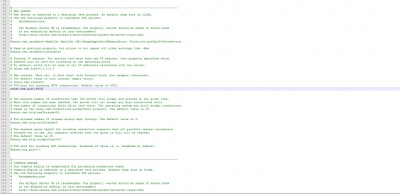
To change the default port, under the header WEB SERVER in the file sonar.properties in the map from SonarQube, the # must be removed and now the sonar.web.port can be changed, for example to 5900.
For SonarQube Scanner:
The following link can be used to install SonarQube Scanner: SonarQube Scanner.
These settings must be filled in Jenkins (IN DE BUILD EN CONFIGURE)
After Apache Ant, SonarQube and SonarQube Scanner are installed, the next step is to further configure Jenkins.
Now ANT, JDK and Sonarqube need to be installed in Jenkins. In order to do this:
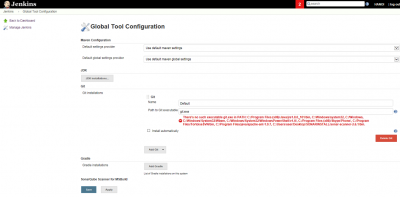
First the button Manage Jenkins in the Jenkins homepage must be pressed, then Global Tool Configuration must be clicked. Once the button Global Tool Configuration was clicked it will appear a menu that will look like the picture below.
The button JDK installations needs to be clicked. Then there will appear a menu that will look like the picture below.
openmbd.com/wiki/CI/Jenkins
openmbd.com/wiki/CI/SonarQube

