Quick Start
HANtune can be used for tuning and calibration, using the XCP protocol or as a generic CAN-dashboard. herefore this quick-start contains two sections: one for tuning and calibration and one for HANtune as CAN-dashboard. This section is intended for first time users.
Contents
Creating a Layout
For tuning and calibration, using the XCP protocol, an ASAP2 file is needed and a Layout is to be created. An ASAP2 File (.a2l) contains all the data about each signal and parameter which the controller uses. HANtune can read this data and allow the user to use it in HANtune. This could be a file which is automatically generated after compiling your Simulink model or one which is provided elsewhere.
In order to load a layout into HANtune, please follow these steps:
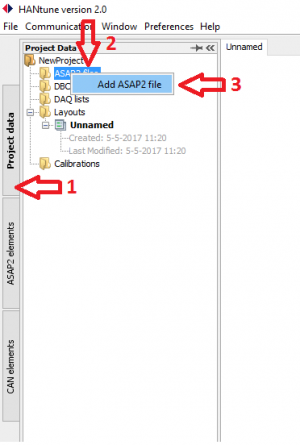
- In the side-tab “Project Data” (1) there is a folder named “ASAP2 files” (2). Right click this folder and choose “Add ASAP2 file” (3)
(Using HANtune for CAN-only? Click "Project Data"(1), right click "DBC files", choose "Add DBC file")
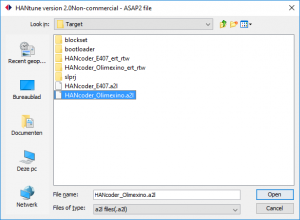
- Browse to the ASAP2 (*.a2l) file which you want to use, select it and press “Open”
(Using HANtune for CAN-only? Select the DBC (*.dbc) file which you want to use, select it and press “Open”)
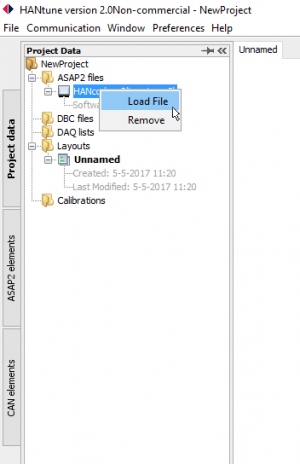
- The file has now been added to your project but is not loaded. To load, double click on the ASAP2 file which you want to load or right click and choose “load file”
(Using HANtune for CAN-only? Double click the DBC file or right click and choose “load file”)
Click here for more info about the ASAP2 tide-tab
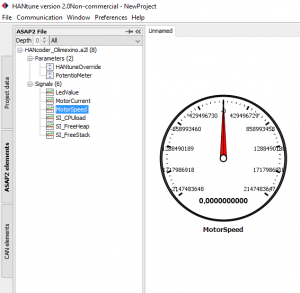
A Layout can have one or more tabs which can contain one or more editors and/or viewers. A default Layout called “Unnamed” is already available and loaded when a new project is created. You can find the parameters and signals under the ASAP2 elements side-tab. (if a layout does not yet exist, right click "Layouts" under the "Project data" sidetab and click "New Layout")
Editors: can be used to send parameters to the target
Viewers: can be used to visualize signals from the target
To create an editor (change parameters):
Editors can be used to send parameters or CAN-Messages to the controller or CANbus, respectively.
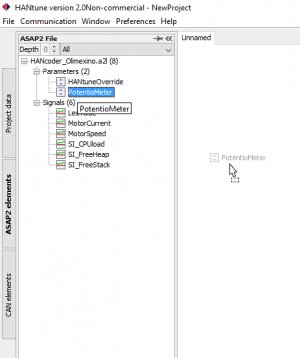
- Go to the side-tab “ASAP2 Elements” (using CAN-Only? Click "CAN Elements" instead)
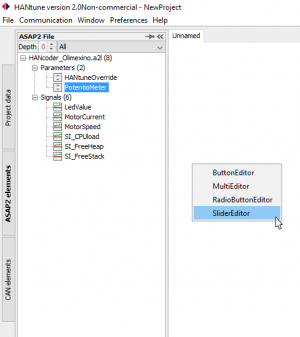
- Search for the parameter which needs to be showed and drag and drop it into your layout (empty white space)
- Choose the right type of editor
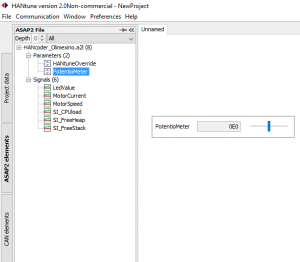
- The editor will appear on screen
Click here to learn more about Editors.
To create a viewer (visualize signals):
Viewers can be used to monitor signals sent by the controller or read CAN-Messages from the CANbus.
- Go to the tab “ASAP2 Elements” (using CAN-Only? Click "CAN Elements" instead)
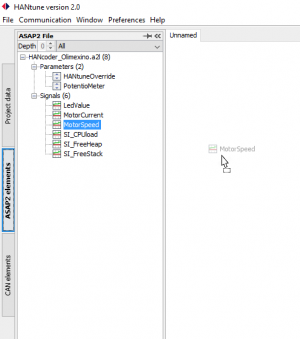
- Search for the signal which needs to be showed and drag and drop it into your layout (empty white space)
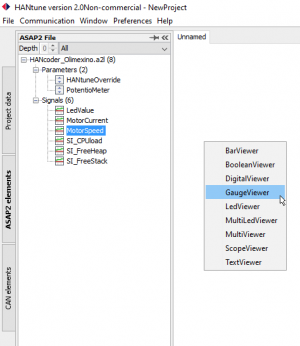
- Choose the right type of viewer
- The viewer will appear on screen
Click here to learn more about Viewers.
You are now ready to connect to the target. Check the communication settings by clicking the menu item “Communication” (top of screen), “Communication settings”. If these settings are correct and your target is powered on and connected to the PC, press F5 and click “Connect and request” to connect.
Click here for more info on establishing a connection
To save your project: click “File”, “Save Project as…” in the menu. Choose a filename and the path where to save your project and click “Save”. Your project will be saved as a .hml file.
Hint: Try to use multi-select! Some editors and viewers are capable of showing more than just one signal or parameter.
Connect to your controller
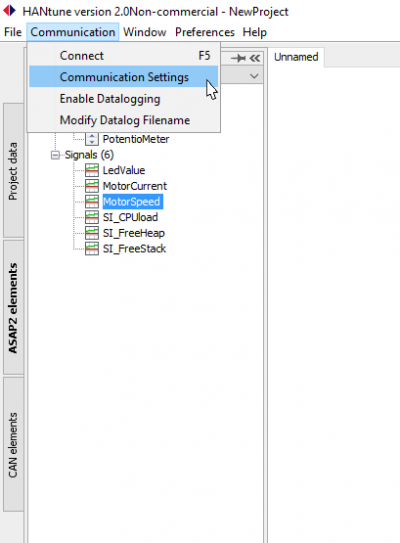
In the upper menu, click "Communication". A submenu will appear, click on "Communication Settings".
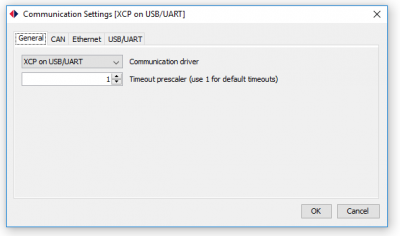
The Communication Settings window will appear. Please notice the four tabs. The first tab contains the general settings. The other three contain the communication medium specific settings.
Currently there are four ways to connect to your controller: using XCP on USB, Ethernet or CAN or using CAN-Only. The latter doesn't require an ASAP2 file but does require a DBC file to be loaded. Depending on which of these communication media is chosen, go to the corresponding tab and check the corresponding settings.
Click here to learn more about the Communication Settings.
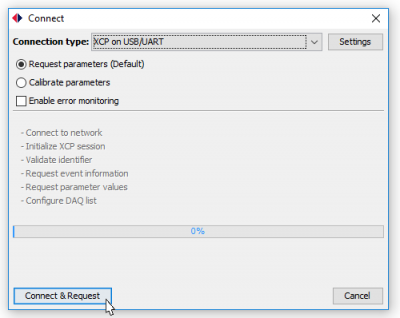
Hit the F5 key or click on the connect button at the lower left corner. The button will turn green when a connection is established.
The connect button will either show "Connect and Request" or Connect, depending on the chosen communication protocol. Click the connect button.
click here to learn more about the Connection Dialog.
